The Making of my Chain Mail Armor
I have always been fascinated with the Middle Ages, and Medieval Europe in general. I grew up watching (and emulating) the great duels in The Princess Bride and The Court Jester. So naturally there came a point when I wanted to stock my own armory. I researched and researched and eventually concluded I wanted to make my own chain mail armor! Once I’d earned enough capital, I embarked on my adventure. It took a few tries with a few different methods, which I will share with you here. But first, let’s cover a little bit of the theory behind making chain mail armor.
What is Chain Mail Armor, You Ask?
Chain Mail is actually a modern term for an ancient type of armor called mail, or maille (in French). The basic idea of mail is to weave a bunch of metal rings together to form a protective mesh. The resulting armor is flexible and protects from slashes and, to the extent allowed by the space between its links, piercing implements. It’s still used today by butchers and shark divers.
In my research on the subject, I have read of two ways that chain mail was made historically. The first was by punching the rings out of a solid plate of metal and riveting them together. The second way is similar, but instead of punching the links out of a sheet of metal, the rings are formed by wrapping a wire around a dowel to form a kind of spring and cutting the spring. The contraption used for making these springs was called a mandrel, I believe. I used this method for all the chain mail I made.
So now that we have some theory of what chain mail is and how it is made, let’s look at how I made my chain mail hauberk!
How Not to Do Things: Part I
My first attempt was to use ~24 gauge floral wire. It wasn't intended to be exactly functional in a battle-ready sense, but it was meant look attractive and “cool.” I used mandrel style, not sheet style. I took the floral wire and wrapped it around a AA battery. Then I would take some delegated scissors and cut the rings with about 1/8 inch overlap. Then I would take needle-nosed pliers and twist, twist, twist until I got a closed ring. The result was ugly. I did not follow the proper flow directions, and as a result, my mail looked weird, with crazy waves propagating throughout. And because I used ~24 gauge wire, the armor was not practical at all. It may have offered slight protection against cutting, but only if my assailant was very careful and sawed gently against the mail, perhaps while purring softly. Not exactly battle-ready.
Because the product was neither beautiful nor functional, I ended up abandoning this method for greener pastures. I did end up with a breastplate-sized patch, though. If I ever find it again I’ll post pictures.
(Part I b)
Before I entirely abandoned floral wire, I experimented with another method. It may sound kind of crazy: I made butted mail by wrapping the floral wire around a AAA battery. To be frank, it just looked silly. It wasn't big enough to pseudo-rivet (read as: twist together) the ends like the AA battery links, and it wasn't small enough for the links to stay together on their own. AAA battery-sized links were an enormous flop.
(Part I c)
Had I learned my lesson yet? No. I tried another way to use floral wire (largely because it was really cheap and I was really poor).
Realizing that the AAA-sized links were too frail for butted mail, I thought, “If I just make a bunch of small links with the thin wire, wouldn't it be the same as less links with heavy wire? So I experimented with making the links by wrapping the floral wire around a LEGO lance. The result was a really tight, very beautiful butted mail. It wasn't very strong, of course, but it was stronger than the AAA-sized fiasco. In fact, it was strong enough to hold up to mild tugs and pulls. And did I mention it was gorgeous? By now I had figured out the flow pattern, and it looked dang good. But it wasn't really strong enough to last in the real world with real use and abuse, and it took WAY too long to make a substantial area of it, to boot. Lance-sized floral wire was a nice toy, but ultimately not what we were looking for. However, if you’re looking at making jewelry, I would look at doing something similar, just a little bit bigger rings and thicker/stronger wire.
LESSONS LEARNED FROM PART I:
- Don’t use floral wire.
- Do observe proper flow directions.
- Don’t use floral wire.
- More links = more work.
- Don’t use floral wire.
But enough of this floral wire nonsense. Let’s get on to something a bit more useful.
How not to do things, Part II: Copper Wire
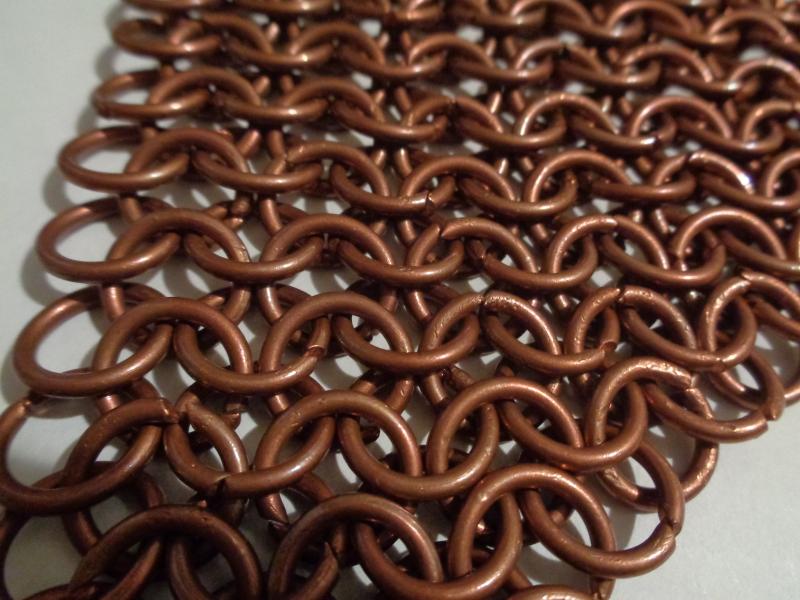
This is a tale of a young man who did not yet know the magic that is Internet shopping. The young man, an aspiring armorer, needed wire that was more heavy-duty than floral wire. So he went to his local hardware store and bought the strongest wire he thought he could manipulate with the pliers he had at home: 12-gauge insulated copper electrical wire. Perfect! A much better solution than what he was using before! And the spool only cost something like $12 USD! What a bargain! Ah, but remember how that copper wire was insulated? That meant- you guessed it – lots and LOTS of stripping the PVC insulation. Without stripping tools. One thing I will say is I got pretty good at taking off chunks of insulation with naught but my nails and some needle-nosed pliers. As good as you can get, anyway. And then I had to find a suitable dowel for a mandrel. I eventually settled on a half-inch diameter for the mandrel, I believe.
Then I had to wind the wire up to make a spring. This was a little bit trickier because unlike my floral wire, this wire was pretty thick and had some stiffness to it. And then there was the fact that I had to strip the wire before I coiled it....
Cutting the spring into links also proved a problem. I knew that the scissors I used for cutting floral wire were out, but I assumed that because wire of that type was cut-able with needle-nosed pliers that I could just use those to cut links from my spring. Oh my. I was quite wrong. First of all, the rings were so small in diameter that my pliers wouldn't even fit in them. Solution? Tin snips! I ended up having to acquire tin snips just to cut the copper spring with some difficulty.
In the end, I did end up using up the spool of copper wire, and ended up with about enough mail to cover a third of my chest. For $12 USD, this did not look good for my high-schooler pocketbook. But the copper mail was quite strong. I could not pull the mesh apart, even with all my might (I tried). This was great news! It meant I was on the right track! But I needed a cheaper, easier solution.

Enter Success I.
Success I: Let’s use Steel
Once I realized that copper was not a great idea, I needed something else for my springs. Instead of silly floral wire or decorative copper, I began searching for something with a bit more mettle (no pun intended). That’s where my hobby of robotics came in handy. I started browsing around various online suppliers I knew of from escapades in robotics, and found that McMaster Carr sold terrific steel springs for pretty cheap. I ordered something like $80 worth, after very careful measurements on how much I would need, how big the rings should be, if they would mesh with my existing copper rings, etc. I estimated how many links I would need was based on how many beach towels I needed to cover the same area as my planned hauberk. Then, I found out how many copper links per square foot of mail I needed, and extrapolated to find out how many steel links I would need to make a hauberk.
Now, remember the trouble I had with cutting the copper links? As it turns out, steel is a lot harder than copper. So when I tried to cut my steel springs with my tin snips, I ended up with nicked tin snips and no cut links. I needed a better way.
The better way to cut steel springs
The better way to cut steel springs is to use a grinder. Just get the thinnest cutting disk you possibly can for the thinnest cut in the spring. Many many thanks to the youth leader who let me use his grinder. And for fashioning a jig to keep the spring in place while we cut it. The thing that surprised me the most was how hot the links got while we were cutting them! (Give me a break – the only previous work I had done with metal was with aluminum foil.)
In the end, we ended up with a over a gallon bag full of metal links, all ready to weave. The Assembly
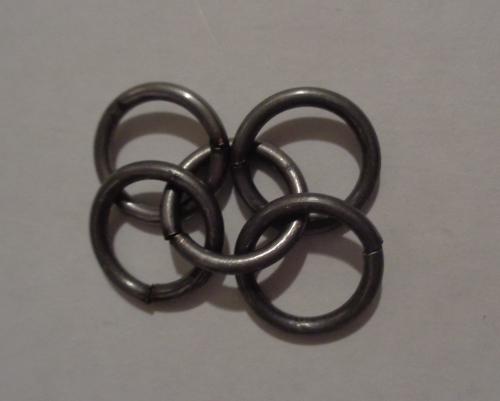
Assembling the chain mail was relatively easy, but very time-consuming. Essentially, it consisted of making a bunch of single rings, which were then joined into the familiar 4-in-1 pattern like so:

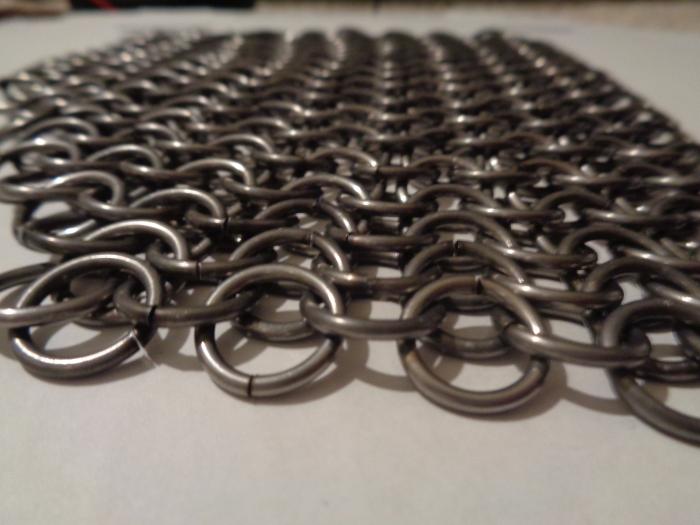
After I had assembled several of these “fiveletts,” as I termed them, I strung them together in a vertical column. After I had assembled these, I wove them together to form the “fabric,” if you will, of the mail. It sounds simple because it is. A few hours’ work might produce something like this:

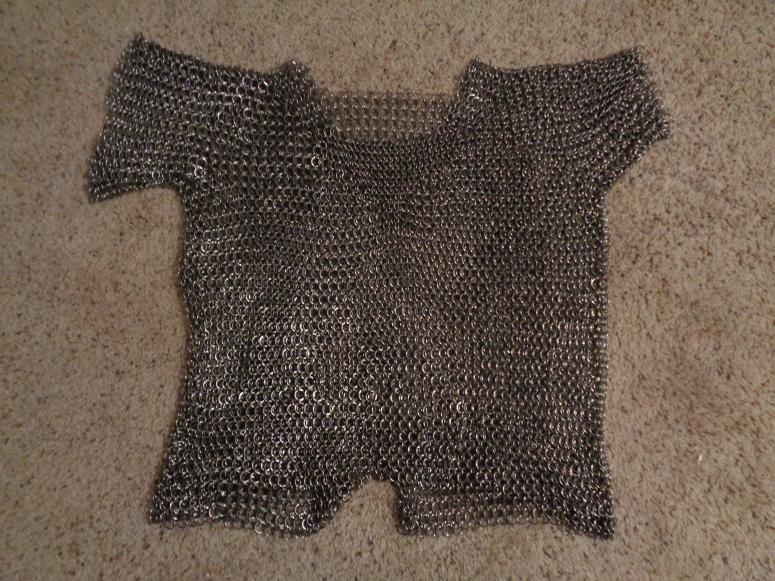
This whole process took many hours over several months. Each day after school, I would fire up a portable DVD player (usually loaded with The Dark Knight), and spend the afternoon working on my armor. Using leather gloves, slip-joint pliers, and eye protection (sometimes burrs jumped off rings as I was closing them), I knitted myself a working haubergeon. Isn't it lovely? 🙂
